59280 Armentières
Change language
Product successfully added to your shopping cart
Votre panier
Items : 0 Items : 1


The installation of a terrace on a pedestal is the easiest and quickest method to set up: follow the assembly steps and build your terrace in less than 3 days!
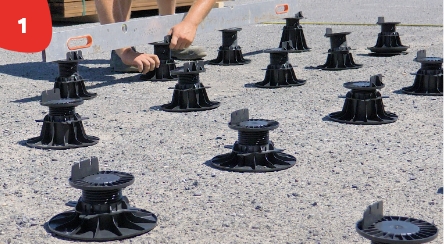
step 1Determine the required spacing, place the pedestals on the ground, adjust them and check everything with a spirit level.
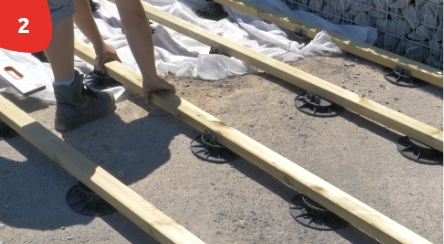
step 2As soon as the installation is level, place the joists in front of the pin located on the head of the pedestals.
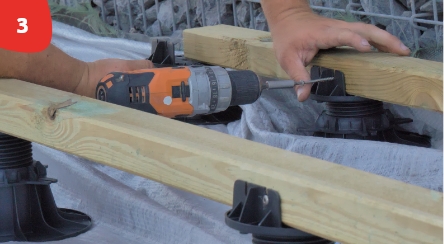
step 3Then screw the joists onto the pin of the stud provided for this purpose. This allows for good maintenance.
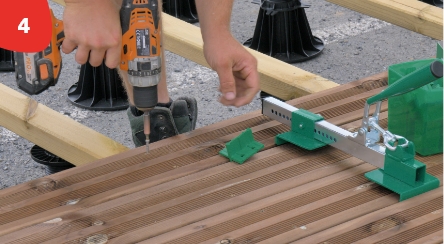
step 4Finally, attach the wooden slats to the joists using a screwdriver and wood screws.
Model :
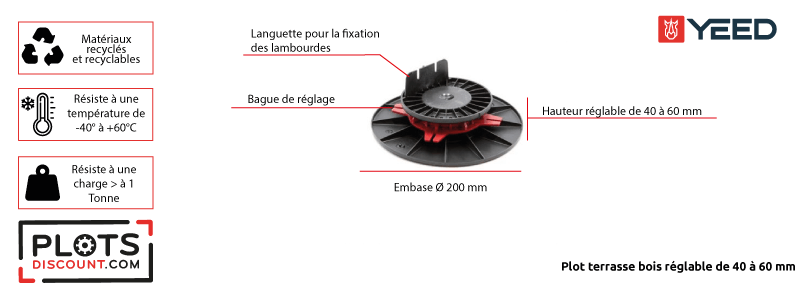
Adjustable pedestal 40/60 mm for wooden deck - YEED (ex Rinno)

| Color | Black |
|---|---|
| Material | Polypropylene |
| Warranty | 10 years warranty |
| Origin | Manufactured in France |
| Conformity | Compliance with the DTU 43.1 and 51.4 |
| Resistance | Resistant to acid and basic solutions, atmospheric agents, temperatures between -40°C and 60°C |
| Load | Resists the test of crushing with a load superior in 1 ton |
| Brand | YEED (Ex Rinno) |
| Type | Adjustable |
| Use | Wooden slab, Composite slabs |
| Adjustable height | 40 to 60 mm |
| Compatibility with extension | No |
| SH Code | 39259010 |
| Country of Origin | UE |
| Installation surface | Loose soil |
| Type of setting | Manual |
Find all the documents that will be useful to you for the realization of your projects
Click on a thumbnail to load the video


- For further information on the nature of the review controls, as well as the possibility of contacting the author of the review please consult our Transparency Charter.
- No inducements have been provided for these reviews
- Reviews are published and kept for a period of five years
- Reviews can not be modified: If a customer wishes to modify their review then they can do so by contacting Verified Reviews directly to remove the existing review and publish an amended one
- The reasons for deletion of reviews are available here.
- 1
 7
7 - 2 3
- 3 7
- 4 48
- 5 210
PATRICK B. published the 15/04/2024 following an order made on 02/04/2024
facile d'utilsation, dans problème, a voir dans le temps
Franck H. published the 02/03/2024 following an order made on 23/02/2024
Très bonne qualité sur ces plots. Modèle livré avec un seul trou de vis donc commandé un peu trop de vis
Christian C. published the 02/03/2024 following an order made on 19/02/2024
Bon rapport qualité prix
SEBASTIEN F. published the 20/02/2024 following an order made on 14/02/2024
Parfait, bonne qualité, épaisseur correcte du produit.
Basile B. published the 18/02/2024 following an order made on 01/02/2024
Bonne qualité
Patrick M. published the 31/01/2024 following an order made on 25/01/2024
Facilité d’utilisation
David M. published the 26/11/2023 following an order made on 19/11/2023
Correspond à mon besoin
Olivier L. published the 26/11/2023 following an order made on 14/11/2023
bon produit , tres bon rapport qualité/prix