How to make a terrace on pedestals ?
To have a strong and durable patio, laying pedestals require to follow few steps. Quick and easy, as well as professionals than individuals can use this technique. Plots-discount.com will give you all the advice to carry out your patio design project.
To make a paved surface
1- Ground preparation
If laying is on slab or stabilized ground (of gravel, for example), then no
advance preparation is necessary. The paving pedestals are placed
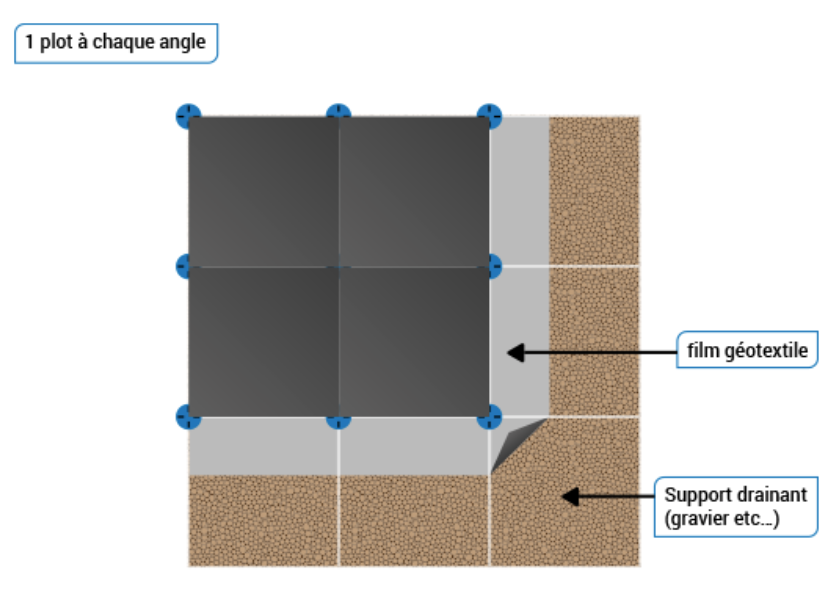
directly on the ground. However, if the installation is done on the grass,
you must excavate the ground about 15 cm, place a geotextile to limit the
grass grows and cover it with a draining material such as gravel on about
15 cm.
2- Installation of the paving pedestals
You do not need tools, simply put your pedestals on the ground. With heavy slabs,
the pedestals will be weighted. They should be positioned on the ground homogeneously,
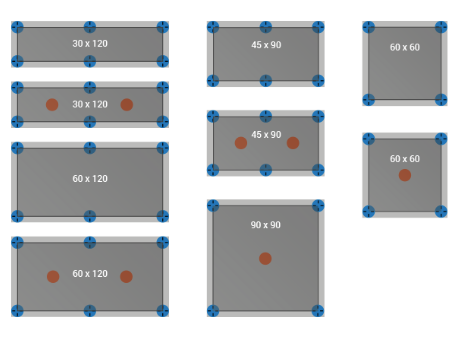
the space between each pedestals will depend on the size of the slabs : For slabs 40x40,
plan 6 pedestals per m2. If they measure 50x50 cm, it will be 4 per m2. For slabs 60x60
cm, 3 per m2 will be necessary. You have to count a pedestal for each angle. However,
for more support and stability, add one in the middle of each slab in breaking the spacers
on the pedestal head. For slabs measuring 60x60 cm, an additional pedestal in the middle
of the slab may be necessary according to its material. As regards the rectangular slabs,
they must be placed on 6-8 pedestals according to their size. In doubt, please contact us
on the chat online. An advisor will answer all your questions.
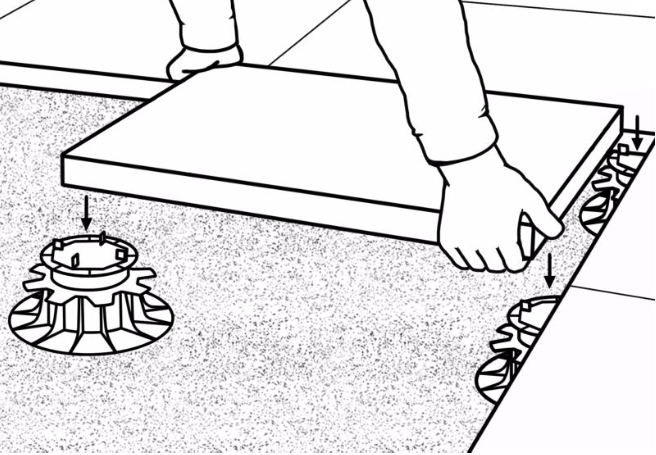
3- Putting slab on the pedestals
It’s very simple, gently put them on the pedestals, the spacers present on the pedestal
head will position the slab.
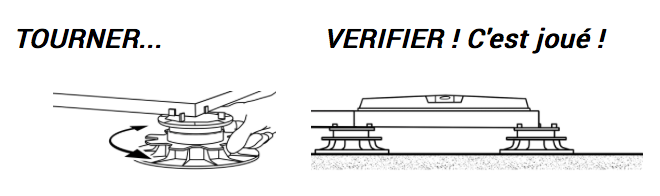
4- Adjust the height
Check the position of each slab using a level indicator. If there is a difference in
level between the pedestals, turn the adjustment ring with your hand and set the
pedestals to the desired height.
To make a wooden deck
First, make sure that the joists are in metal or wood, but especially not composite.
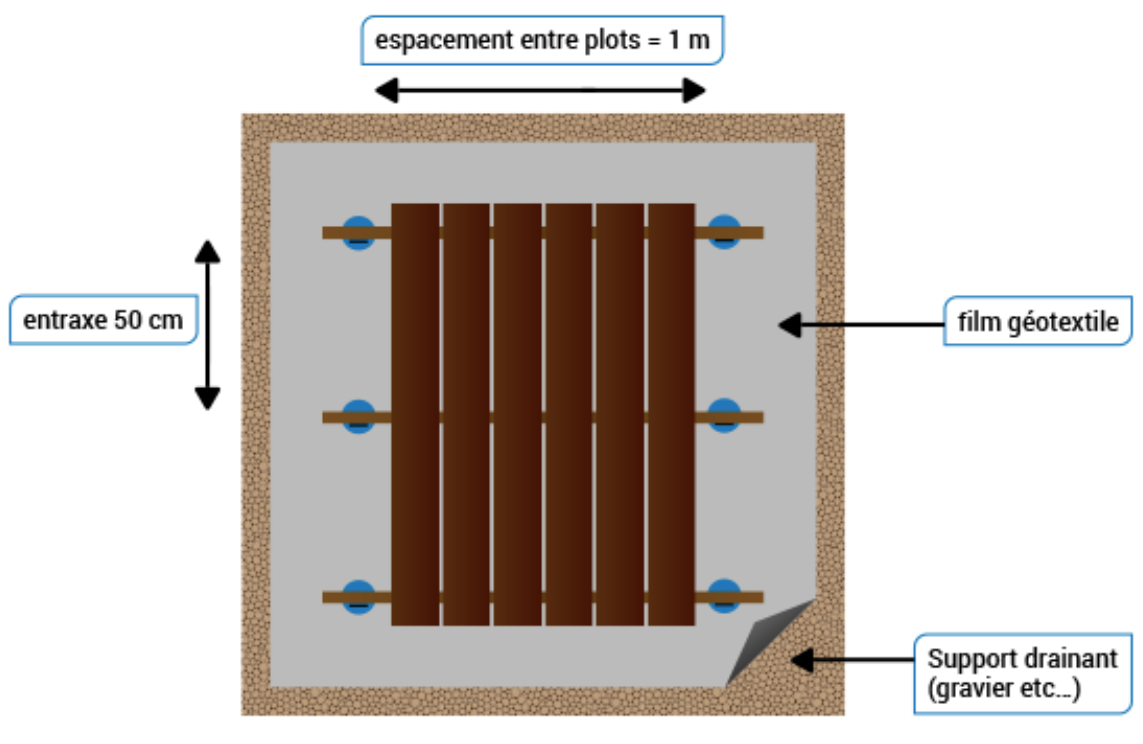
1- Ground preparation
As before, if laying is on slab or stabilized ground (of gravel, for example), then no
advance preparation is necessary. The decking pedestals are placed directly on the
ground. However, if the installation is done on the grass, you must excavate the ground
about 15 cm, place a geotextile to limit the grass grows and cover it with a draining
material such as gravel on about 15 cm.
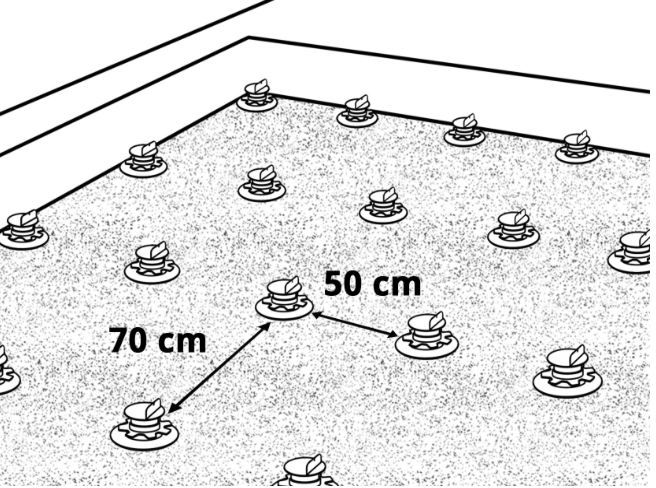
2- Installation of the joist support pedestals
Place the decking pedestals on the entire surface. The center distance between the
joists must be 50 cm, and between pedestals between 50 cm and 1 m maximum following the
joists section. There must have between 6 and 9 blocks per m2.
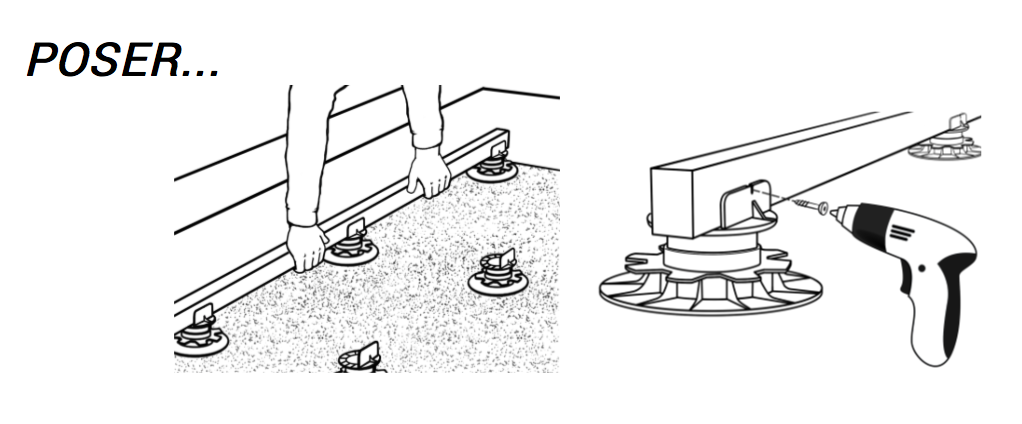
3- Putting joists on the pedestals
Once the pedestals positioned on the entire surface, place the joists on them stick against
the flaps present on their head. Screw the joist through the flaps in using two screws.
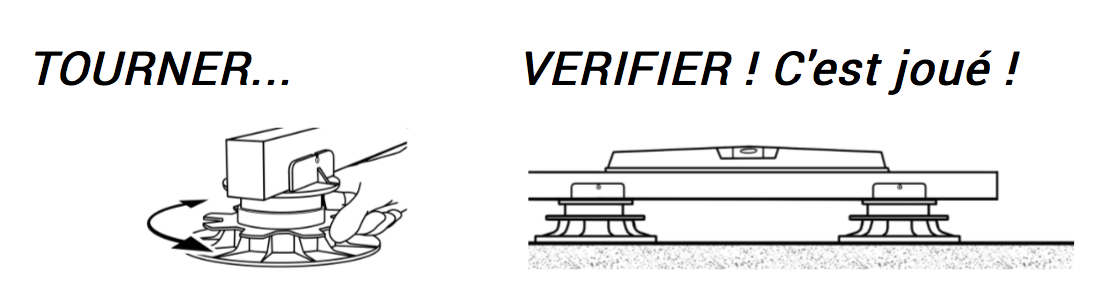
4. Adjust the height
Check the position of each joist using a level adjustor. If there is a level difference
between the pedestals, turn the adjustment ring with your hand and set the pedestals to
the desired height.
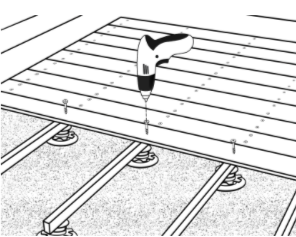
5. Fixing the wooden slats
Place the slats of wood perpendicular to the joists. Then fix them on joists with screws.