You cannot place a new order from your country. United States

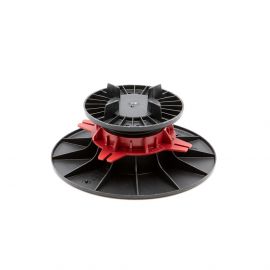
Adjustable UPTEC SUPAL paving terrace pedestal 28/43 mm - 2 mm seals- Profilitec

PROFILITEC

Reference : PRO-SUPAL-SUPA2

shipment in 24/48h
Your orders are shipped
Customer service
Our teams are at your disposal from Monday to Friday from 9am to 6pm
D.T.U. Standards
All our products comply with current standards
secure payment
Our site is protected by an SSL certificate
the guarantees plots-discount.com
Dessin technique du plot dalle Uptec Supal 2 mm de Profilitec

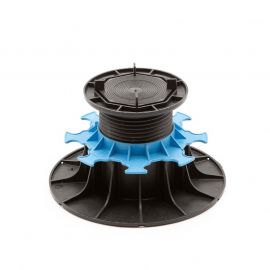
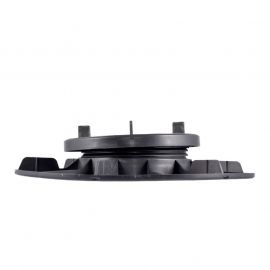
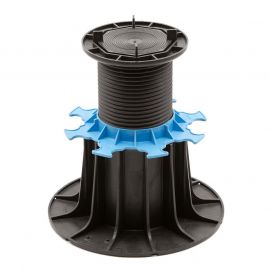
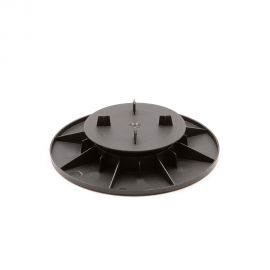
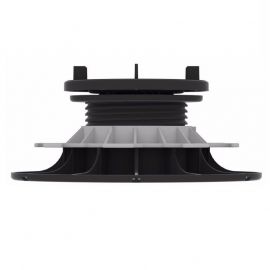
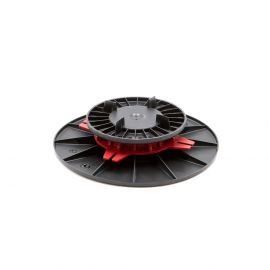
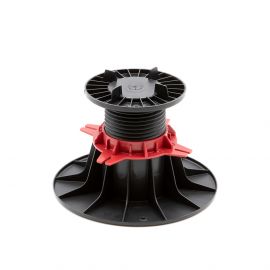
UPTEC SUPAL pedestal adjustable from 28 to 43 mm with 2 mm seals for paving terrace - Profilitec

The Uptec SUPAL paving terrace pedestal is an adjustable pedestal from 28 to 43 mm allowing you to create the foundations of your porcelain stoneware type tiling terrace. This premium pvc pedestal is versatile and adapts perfectly to your constraints and desires for change. Offered here in a 2 mm joint version, this smart pedestal can easily be transformed into a 4 mm joint version and even a wooden terrace pedestal, just by changing its head!

The advantages of the UPTEC SUPAL adjustable paving terrace pedestal from 28 to 43 mm from Profilitec

  • Quick and simple installation, without structural work or fixing
  • Seamless laying
  • Base of the pedestal pre-cut to facilitate the realization of the angles
  • Perforated base to promote the flow of rainwater
  • Allows good air circulation and avoids moisture problems
  • Change from a fixed head to a self-leveling head by simply screwing the green locking ring located inside the head
  • Switching to a self-leveling head compensates for height differences of up to 5%
  • Interchangeable head: change from a UPTEC SUPAL 2 mm paving pedestal to a 4 mm pedestal or a wooden terrace pedestal by simply changing the head
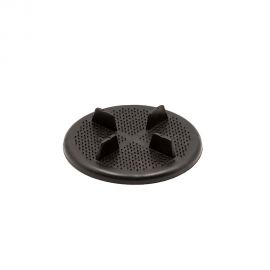
  • Head equipped with anti-noise rubber for your sound comfort when passing through your terrace
  • The installation of UPTEC SUPAL pedestals is done on cement, concrete, EPDM, rubber, monolayer, other roofing systems, on insulating materials, or on a pre-existing terrace

In practice, step 1: draw up the layout plan

Before starting the construction of your tiled terrace on pedestal, it is necessary to think about your project and describe it on a layout plan. This scale sketch of your paving terrace will take the shape of your landscaping and its dimensions.


But that's not all ! Lay out on paper your UPTEC SUPAL pedestals and your tiling tiles in order to know the quantities before you start and thus, make optimized purchases. Count 4 pedestals per paving and do not forget to add an additional central pedestal for pavings over 50 x 50 cm.


This first step will allow you to project yourself into your terrace project and will greatly facilitate your task during this realization.

Step 2: lay your UPTEC SUPAL paving terrace pedestals

  1. Before laying your Profilitec UPTEC pedestals, make sure that the surface on which the foundation supports are laid is perfectly clean, with no trace of liquid, dirt or foreign materials.
  2. Once this verification has been carried out, place your first pedestal. Start from a corner. Do not forget to cut the base on two sides (following the pre-cut line) to properly install your pedestal.
  3. Adjust the height of your paving terrace pedestal.
  4. Continue laying your first row of UPTEC SUPAL pedestals. Be sure to space your pedestals well from the dimensions of your pavings.
  5. Note, for optimal use of UPTEC SUPAL PVC supports, prefer porcelain stoneware paving 2 cm thick and 60 x 60 cm in size. This configuration requires the addition of a central paving pedestal. Place it, be careful while breaking the fins with the SUPAK 3-in-1 wrench.

Step 3: lay your porcelain stoneware tiles

  1. In the same way as for paving terrace pedestals, lay your porcelain stoneware tiles starting with a corner.
  2. After each paving installation, check the flatness of your structure with a spirit level. In case of misalignment, adjust the height using the SUPAK 3 in 1 wrench.
  3. Then repeat these operations until the surface of the porcelain stoneware tiles is covered.
  4. Ultimately, you may have to cut the porcelain stoneware tiles across their width. To do this, use a wet saw with a diamond blade suitable for tiling.

Step 4: make the side finishes

    For the side cladding of your tiled terrace on pedestals, you can opt for a classic porcelain stoneware closure with BSJ profile or for the BSR edge profile from Profilitec.

    1/ Side closure with BSR edge profile

    This profile allows you to close your paving terrace laterally simply and quickly.

    1. Position the pedestal so that the cut side is facing out.
    2. Lay the BSR profile between the fins of the paving terrace pedestal
    3. Lay the porcelain stoneware paving

    2/ Side closure with porcelain stoneware cutout and BSJ profile

    If you opt for the BSJ profile, you will first need to equip yourself with the Rinno ClipSystem.

    1. Place the Bottom ClipSystem under the base of the paving pedestal
    2. Position the pedestal with the cut side facing out
    3. Lay the BSJ profile on the head of the pedestal
    4. Cut your porcelain stoneware tile at the correct height (distance between the BSJ profile and the Bottom ClipSystem)
    5. Place the cut tile between the BSJ profile and the Bottom ClipSystem
    6. Install your porcelain stoneware covering.


    Your terrace is perfectly finished, now all you have to do is enjoy it!

    Accessories for laying a porcelain stoneware terrace on a UPTEC pedestal by Profilitec

    • SUPAK 3-in-1 adjustment key to go from a fixed to a self-leveling head, remove the fins from the UPTEC pedestals and adjust the height of the terrace pedestals
    • BSR aluminum edge for the side closure of your paving terrace
    • BSJ aluminum border for the side cladding of your tiled terrace on pedestal
    • Rinno ClipSystem side closure system
    • Adjustable paving carrier to make it easier for you to transport porcelain stoneware pavings and lay them without hurting your back

    Technical characteristics

    • Adjustable from 28 to 43 mm
    • Fin thickness: 2 mm
    • Base diameter: 190mm
    • Head diameter: 130mm
    • Resistant to frost (-20°C) and UV (+80°C)
    • Fire resistant: HB according to UL94 regulations
    • Resistant to 1 ton load
    • Composition: 80% recycled material
    • 100% recyclable
     
    The steps of installation a terrace on pedestals

    The installation of a terrace on a pedestal is the easiest and quickest method to set up: follow the assembly steps and build your terrace in less than 3 days!


    step 1Determine the required spacing, place the pedestals on the ground, adjust them and check everything with a spirit level.

    step Once the installation is level, place the tiles on the head of the pedestals.

    step 3Then adjust the height of the pedestals and check everything one last time with a spirit level.

    step 4Finally, make the cuts to close the terrace laterally.


    Installation of the pedestals
    Installation of slabs on pedestals
    Adjusting the pedestals
    Finishing the terrace
    Data sheet

    Model : PRO-SUPAL-SUPA2


    Adjustable UPTEC SUPAL paving terrace pedestal 28/43 mm - 2 mm seals- Profilitec

     
    The...
    PROFILITEC
    MaterialPolypropylene
    Warranty2 years
    OriginMade in Italy
    BrandProfilitec
    TypeAdjustable, Self-levelling
    Adjustable heightFrom 28 to 43 mm
    Installation surfaceLoose soil, Uneven/Inclined ground
    Type of settingFrom the top
    Download
    Find all the documents that will be useful to you for the realization of your projects

    Profilitec_Pose_dalle

    Profilitec_Pose_dalle_en

    Télécharger

    Brochure UPTEC 2021 FR

    Brochure UPTEC 2021 FR_en

    Télécharger

    AVIS-DE-NON-RESPONSABILITÉ

    AVIS-DE-NON-RESPONSABILITÉ_en

    Télécharger
    View the trust certificate
    • For further information on the nature of the review controls, as well as the possibility of contacting the author of the review please consult our Transparency Charter.
    • No inducements have been provided for these reviews
    • Reviews are published and kept for a period of five years
    • Reviews can not be modified: If a customer wishes to modify their review then they can do so by contacting Verified Reviews directly to remove the existing review and publish an amended one
    • The reasons for deletion of reviews are available here.

    4 /5

    Based on 1 customer reviews

    • 1
      0
    • 2
      0
    • 3
      0
    • 4
      1
    • 5
      0
    Sort reviews by :

    Jean-Philippe M. published the 24/05/2023 following an order made on 07/05/2023

    4/5

    Pas de problème avec ces plots

    Get advice from our experts!

    Sign up now
    to our newsletter

    English (United Kingdom)
    Change language